
Before you begin:
– Check to make sure that there are no missing or broken parts.
-The model should be carefully cleaned with warm soapy water and a soft toothbrush.
– Part seams or mold lines should be sanded and filled as necessary.
– All parts should be test fitted before gluing.
– A Cyanoacrylate glue, (super glue) should be used in attaching parts.
– Read through the instructions completely before gluing or painting.
– Remove primer and paint to expose raw plastic to allow proper adhesion of glued parts.
The following parts list should be your guide throughout the assembly process; ( Decals not shown)
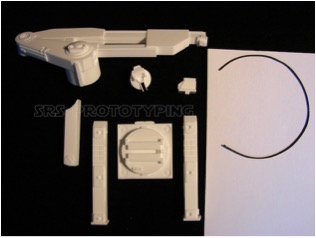
Lunar truck crane
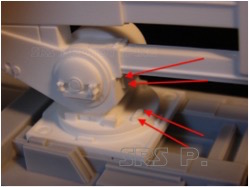
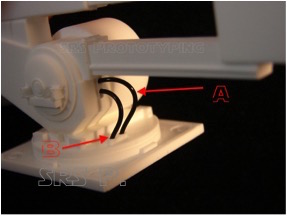
Before going any further, you should drill out the holes for the power cables. The flexible hose supplied is 1mm. or. O3937” in diameter. Start with a 1mm or equivalent size drill and go up in size slowly if the hose does not fit into the 1mm holes drilled. Drill one hole first to test fit the hose. Red arrows, indicate where they are located, there is a starter point for your drill.
Lunar truck crane
Lunar truck crane
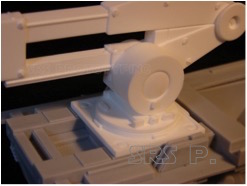
Take notice of how the bottom plate for the crane locates to the truck bed. The small ribs will locate it in place. Do Not glue it in place yet.
Lunar truck crane
This is how the crane body fits into the base.
Lunar truck crane
Lunar truck crane
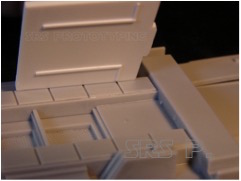
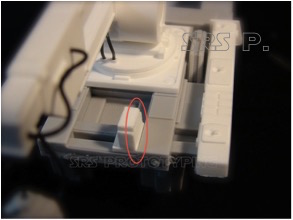
Once you have the Crane body glued to its base, but not glued to the bed, you should test fit the small bed block. DO NOT glue the block in place. Because of the tight fit with the crane’s lower arm, you may need to remove material from the outside of the block for proper fit. ( Red circle )
Lunar truck crane
Lunar truck crane
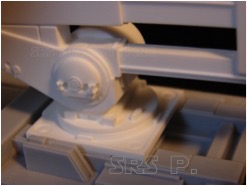
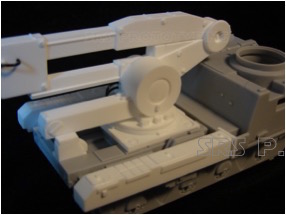
The image shows the lower arm in place. It will touch the block when in position. Once you have the lower arm glued to the crane you should consider painting and decals before gluing the crane to the truck bed. The hoses can then be attached in their positions. This will keep the hoses free from paint and you won’t have to mask them off. It is also possible to add the hoses after gluing the crane to the truck bed, your decision.
The image above also shows the side boxes in place.
Hose Placement
You are supplied with 6” of flexible hose. You may need all of it, so be careful when measuring.
I recommend you start the hoses on the base first to get a feel for them.
Lunar truck crane
Hose A length- .730”
Hose B length- .600
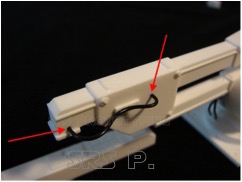
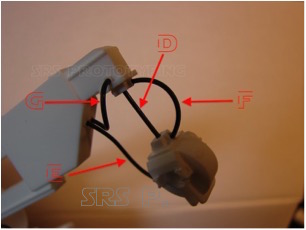
Hose ‘C’ is show in place. Try to duplicate the shape you see here as it matches the filming model closely. To attain that shape, glue the ends in first, and then glue the center portion to the raised plate. You can move the hose left & right to adjust the shape before applying the glue. Hose C length- 1.340”

Lunar truck crane
Hoses D-G follow.
Lunar truck crane
Place the hoses in alpa. order. Hose length:
D= .530 E= 1.0 F= .770 G= .880
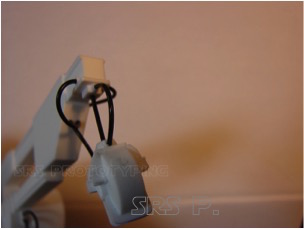
The crane clamp will hang at an angle due to the hoses pushing/puling on it as shown below, that is OK.
Lunar truck crane
Decal Placement
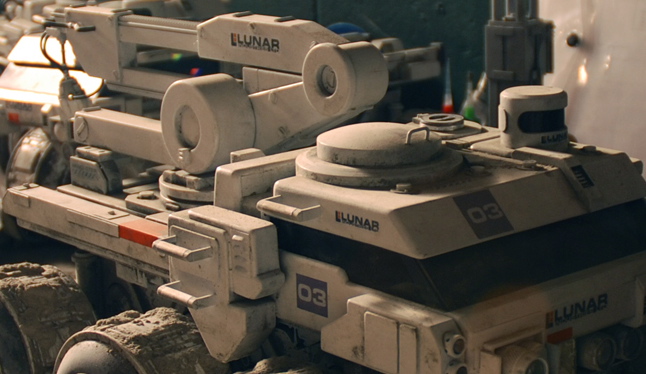
You have two small decals for the crane. One “Elunar” is placed on either side of the top arm of the crane. Notice that the crane version gets the number 3 NOT number 1. Also note the extra orange section that will need to be painted on the side boxes.
Lunar truck crane
Remember to send me images of your completed kit, to be posted on this web site!
Thank you for your purchase!