
A big change of pace compared to Sci-Fi vehicles! This sculpture will be based on an original illustration done by Elias, from Croatia! He has kindly allowed me to used his design for this kit. I you can view more of his work here: http://nebezial.deviantart.com/ This is going to be as fun as I can make it while keeping to the original design.
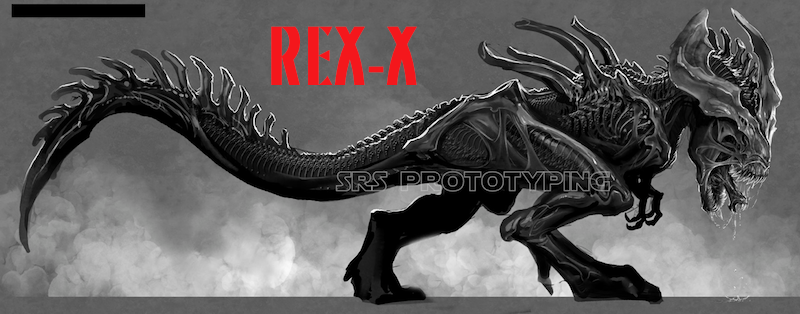
REX-X
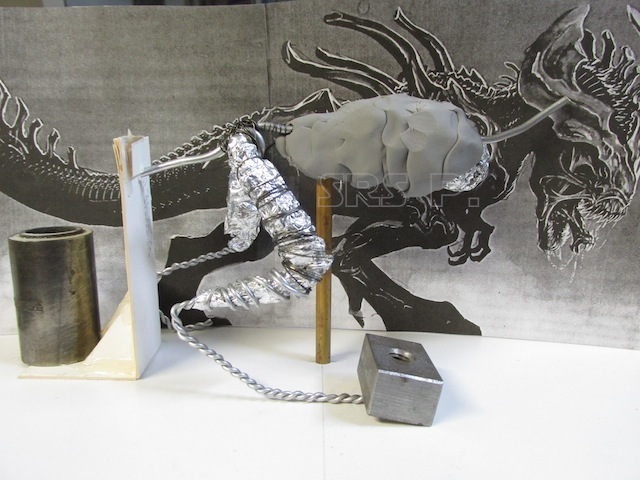
The image is at the proper size so I can start the armature. To make it easy to work both sides at the same time, I added a support rod. This also takes the weight of the body and keeps it properly aligned and positioned from ground level. I am using soft aluminum and steel wire with the brass tubing to create the armature. The tubing will give me a nice hip pivot to locate the legs consistently. I’ve just started to add the clay to the armature. I am using Sculpy firm gray clay for the first time. I usually use a combination of super sculpy and regular sculpy, but I will need a lot of strength, and the gray has been recommended. When it is baked I can grind it with my Foredom and it won’t shatter, and work it with file and sand paper for a smooth finish.The following images show the bulk of the body roughed in and symmetrical and the legs covered with clay.
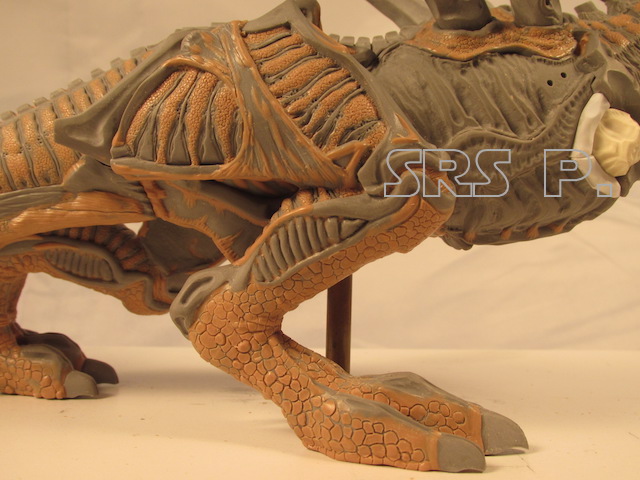
What I am trying to do is to be faithful to the illustration as well as the Alien designs. I wasn’t sure how to render the feet until I saw pictures of the original Alien ‘suit’ worn for the first movie. The fingers for the hands are split down the middle so I thought that would be perfect. I have also added the skin texture to the legs from the illustration I am using. There is a lot of smoothing and blending in general yet to go on the legs, but they are mostly done. I still need to add the large tendons that go on the thighs, but I’ll come back to that later in the sculpt. Now I have to start moving onto the torso and sculpting/carving the rib cage & chest.
Skin pattern..

REX-X
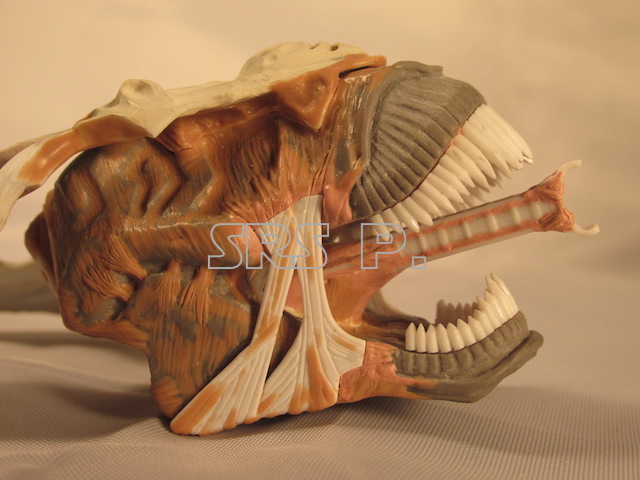
Before starting the rest of the torso, I wanted to establish the neck & head arrangement. I refined the shape of the neck, and added a pivot point instead of a post. I wanted the head to be positionable, if only to a minor degree. It has a very small range of motion, but enough to make one finished kit look different from the next. I used photographs and anatomical drawings of Tyrannosaur skeletons to create the head and jaw. Keeping to the original illustration as much as possible, I cut a cube in clay, baked it and then cut and carved the shape I wanted. I also used card-stock cutouts of the skull and jawbone, to make sure the jaw would actually close inside the upper jaw, as a real T-rex mouth does.

REX-X
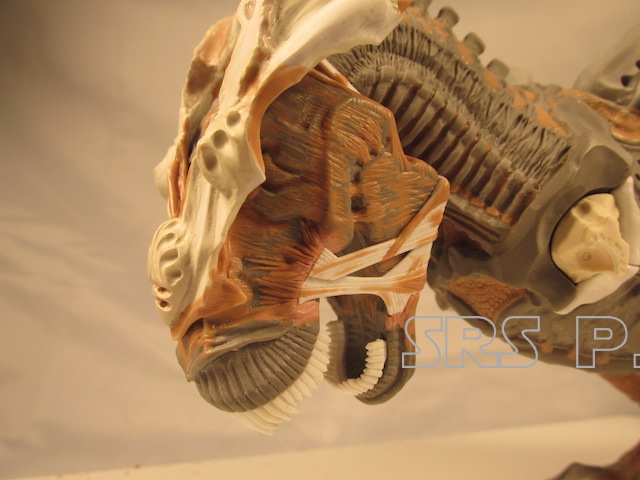
Once I had the skull roughed out, I added teeth. On the Alien Queen, the teeth are a semi-clear material. In order to get that same look, I had to make the teeth separate parts so they could be cast in clear. Again, I used the illustration as a guide as well as the Alien Queen for the look of the teeth.

REX-X
With the teeth completed, I moved on to the pharyngeal jaws. ( These actually exist in real-world animals, such as the moray eel.) These were going to be large when extended, compared to the smaller alien-sized mouth. I made two sets of jaws, one extended and one retracted. I next created the jaw tendons that are so key to the look of the Alien Queen. These will also be cast in clear to mimic the look of the ‘real’ creature.

REX-X

REX-X
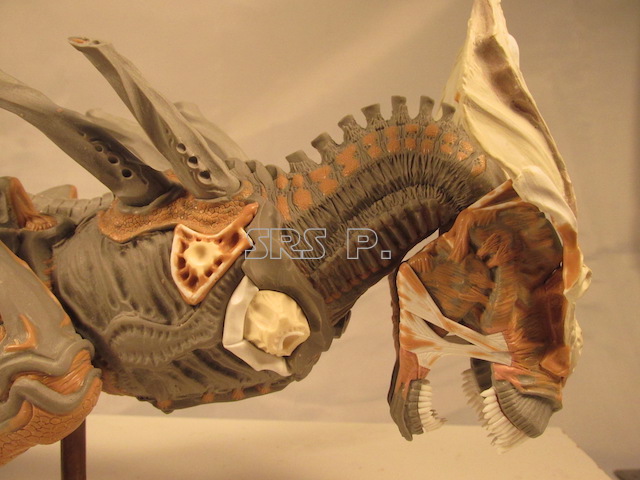
I used the film alien skin texture as a guide for the neck and the illustration for the spine details. It is about 50% complete of skin details.

REX-X
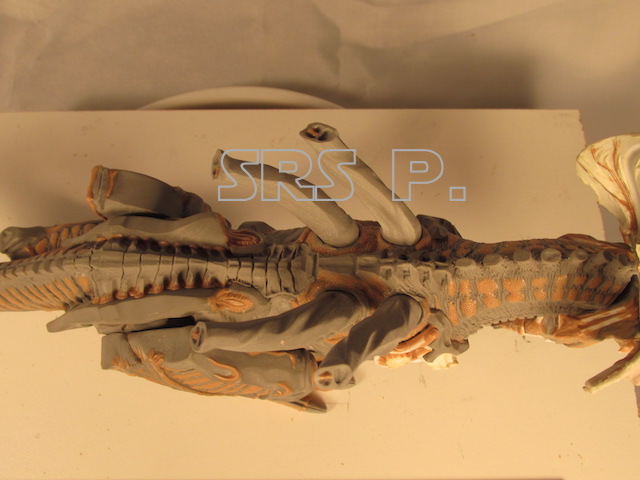
The same skin texture on the leg was added to the neck. More dino-like texture will go in this area as well, it will not look as empty when completed. The four large tubes have been sculpted and are shown in position on the upper back of the ‘beast’.

REX-X
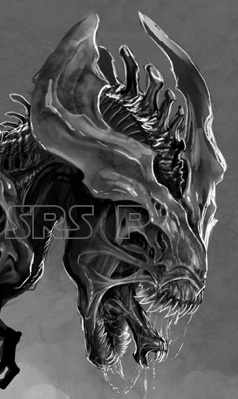
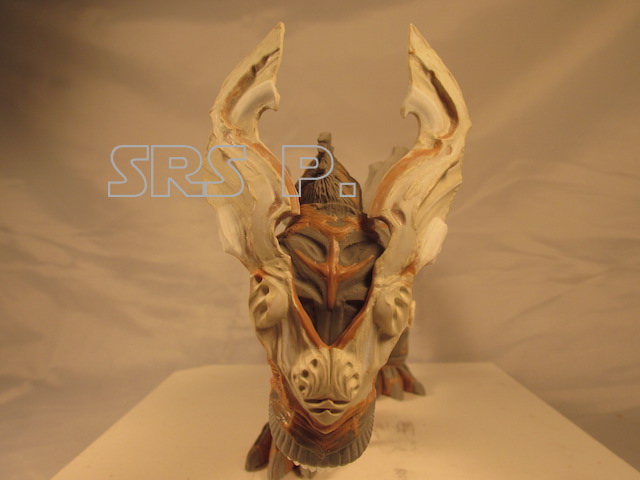
One of the most important aspects of the King Alien is its large crest, pictured below.
I started with a card stock pattern so I can have symmetry from left to right. I heat-formed the sheet styrene halves and attached them together onto the locator peg. I then heat-formed them again to get closer to the shape and position shown in the illustration. I added more styrene cut-outs on top of the crest to get the forms matching.

REX-X

REX-X
The layers of styrene are in place on the top surface and I have added body filler underneath them. I then added A+B epoxy for more detailing and for strength. I did not want to add wax for detailing because of the thin-flexible nature of the styrene. Too much flexing and the wax could crack or pop off, not good!

REX-X

REX-X
With the crest in place on the head, it is starting to look impressive. There is more detailing to be done on the underside, but it is about 90% complete.

REX-X

REX-X
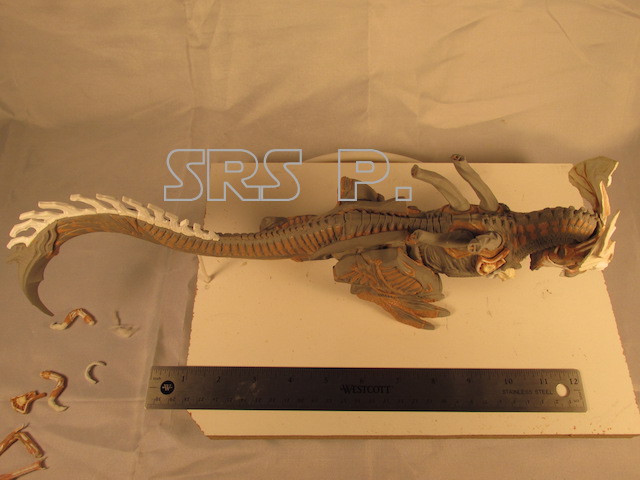
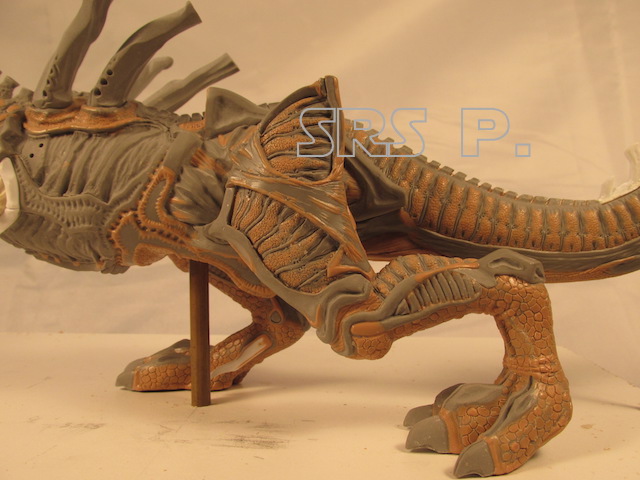
With the addition of the tail, it makes this beasties 15″ long!! I stared with a wire armature covered in clay and added an additional support to hold it up in position and baked it to hold the shape.

REX-X
I have the shape and curve I want, so now to ‘flesh it out’ and start adding details. The skin pattern from the legs and neck repeats on the tail. There are also formidable spines and a tail spike. I used styrene for the spines so I would not have to worry about them cracking or breaking. They will be separate parts in the final kit.

REX-X

REX-X
Finally, I have the back vertebra and tail joint completed.

REX-X

REX-X
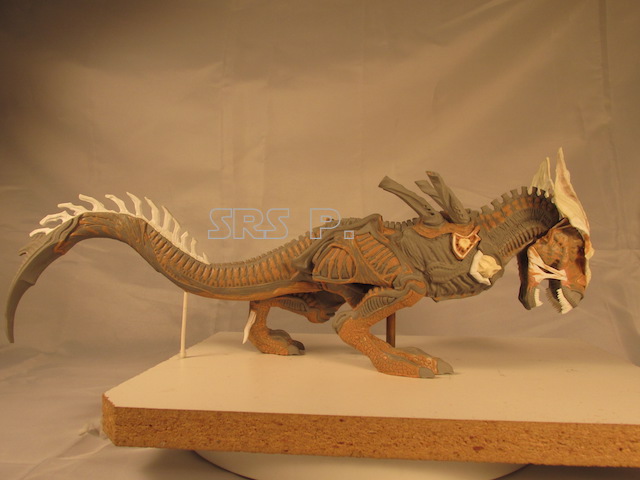
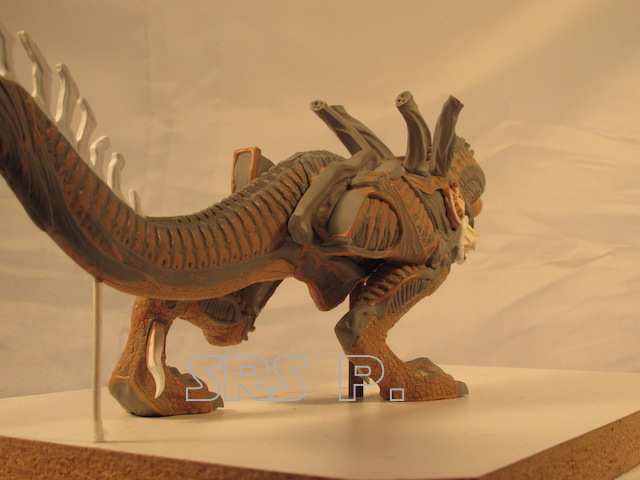
Well, a lot done since the last update to this page. I think I fussed and detailed it enough now to consider the master as completed. There are 28 parts in total.

REX-X
Its nice to finally see it completed and assembled! This beastie is 5.5″ tall, 2.5″ wide and 15.5″ in length!! The tail itself is as long as the head and body together. The real T-rex was up to 40 feet (12.4 m) long, about 15 to 20 feet (4.6 to 6 m) tall. It was roughly 5 to 7 tons in weight. The skull was about 5 feet (1.5 m) long. I envision the REX-X to be larger than a standard Tyrannosaurus, as the xeno-morph process tends to super-size the original subject’s genetics. I guesstimate he is between 60′ and 70′ feet because of his tail, about 30′ tall and 7-8 tons!
REX-X
REX-X
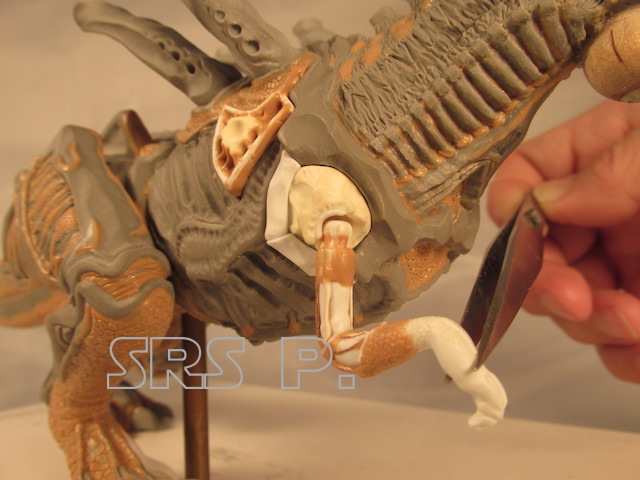
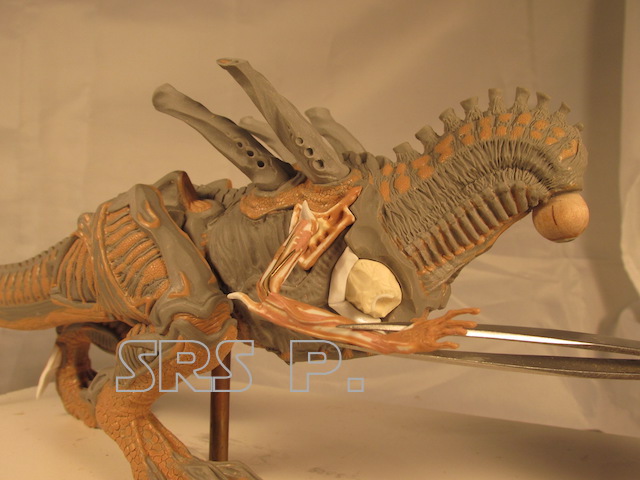
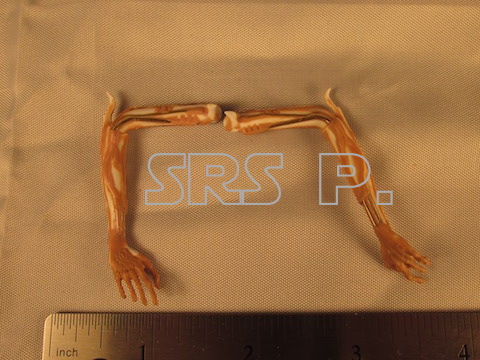
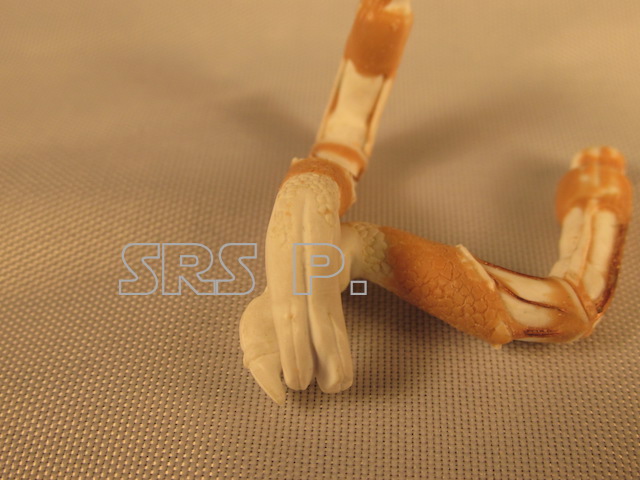
But where are his arms?! They are glued in final position by the builder as he/she sees fit. Not only that, there is the option of two or four arms, the small T-rex arms and the large alien-type arms. The left & right mounting points for the large arms can be left off and the holes filled.
REX-X
REX-X
Here are a bunch more images, thanks for looking! Production as a model kit will be in the beginning of 2015. You can always email me for an up date on the ‘Home’ page.
REX-X

REX-X
REX-X
REX-X
REX-X
REX-X
REX-X
REX-X
REX-X
REX-X
REX-X