
Before you begin:
– Check to make sure that there are no missing or broken parts.
-The model should be carefully cleaned with warm soapy water and a soft toothbrush.
– Part seams or mold lines should be sanded and filled as necessary.
– All parts should be test fitted before gluing.
– A Cyanoacrylate glue, (super glue) should be used in attaching parts.
– Read through the instructions completely before gluing or painting.
– Remove primer and paint to expose raw plastic to allow proper adhesion of glued parts.
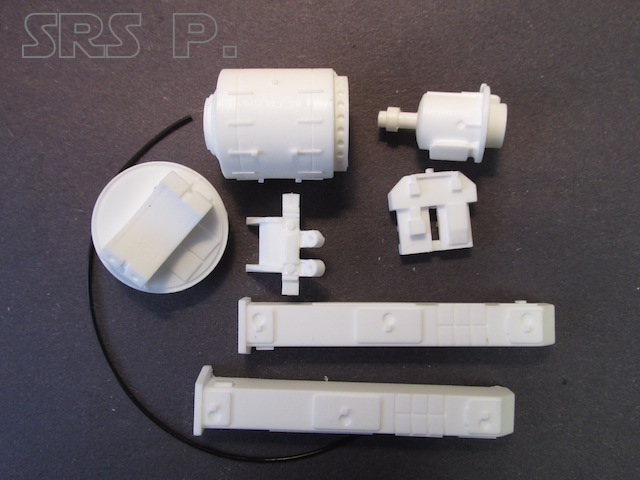
The following parts list should be your guide throughout the assembly process; (Decals not shown)
Lunar truck generator
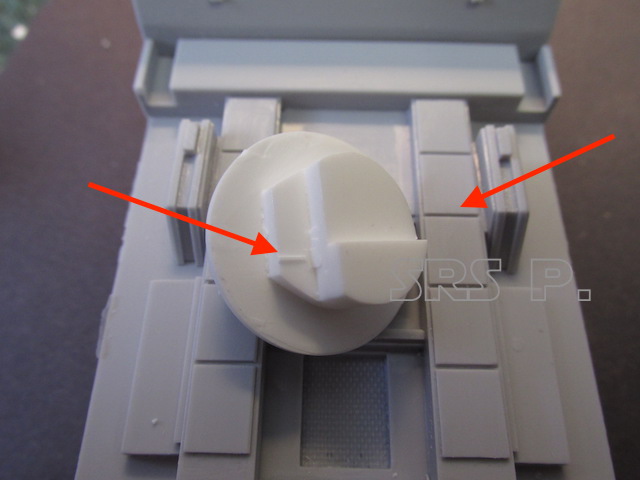
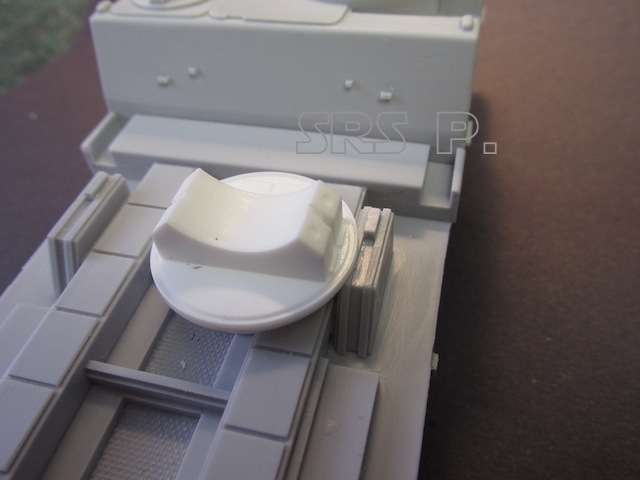
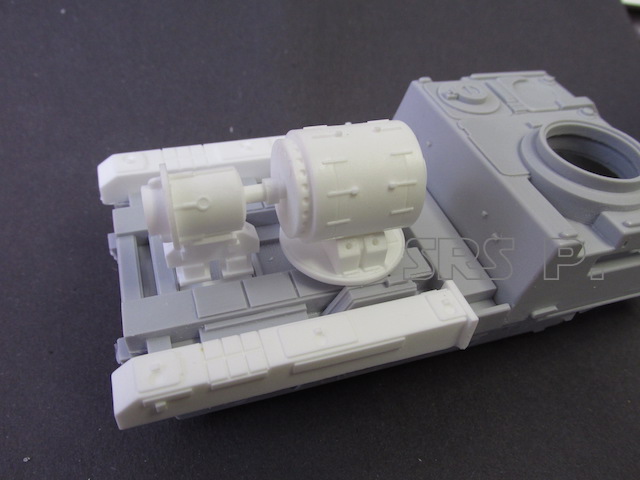
The first part to be placed should be the base for the generator. Note a red arrow points to a small rib on the base and where it aligns on the existing truck bed.
Lunar truck generator
Lunar truck generator
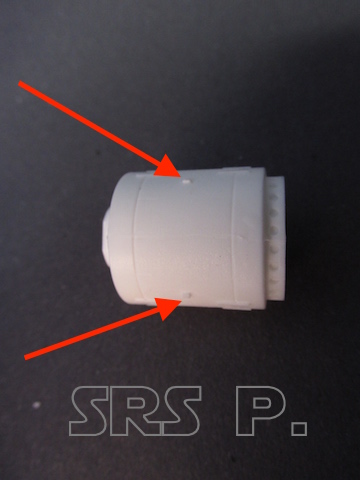
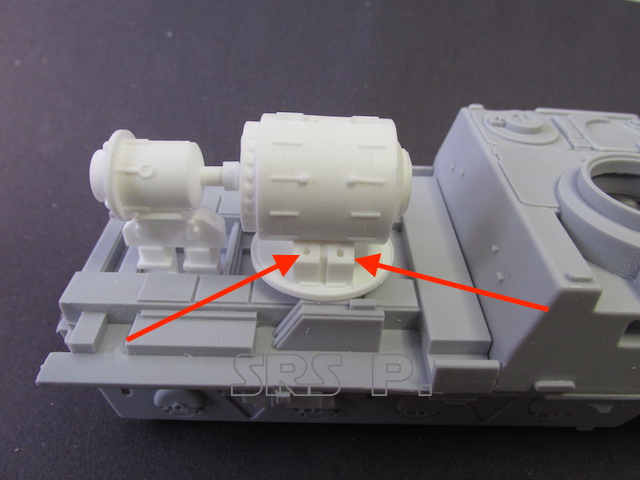
The larger of the cylinders can be placed on the base next. There are two small alignment ribs shown in the images below.
Lunar truck generator
The part in place. Note the position of the small rib.
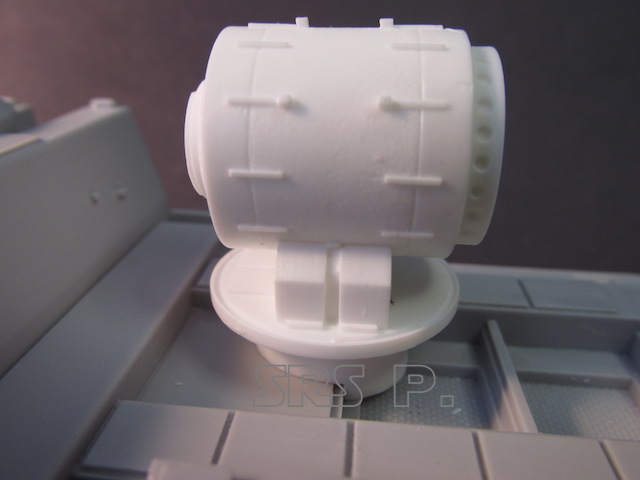
Lunar truck generator
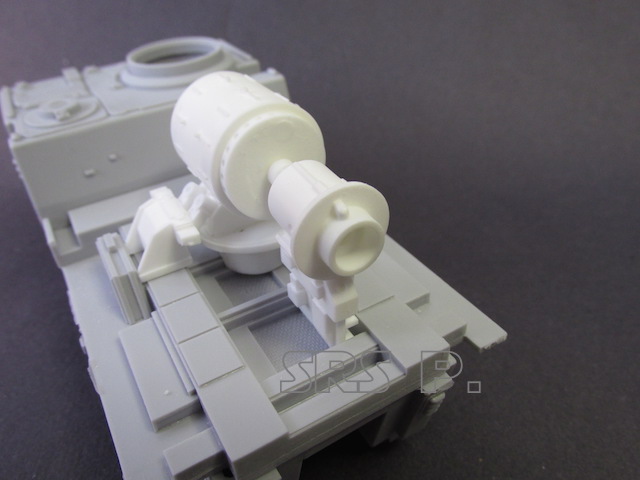
The large box can be place at this time. Before gluing, note the position of the part on the truck bed and cylinder base, and the holes for the hoses should be drilled at this time. The box should be up against the side of the base.
Lunar truck generator
Lunar truck generator
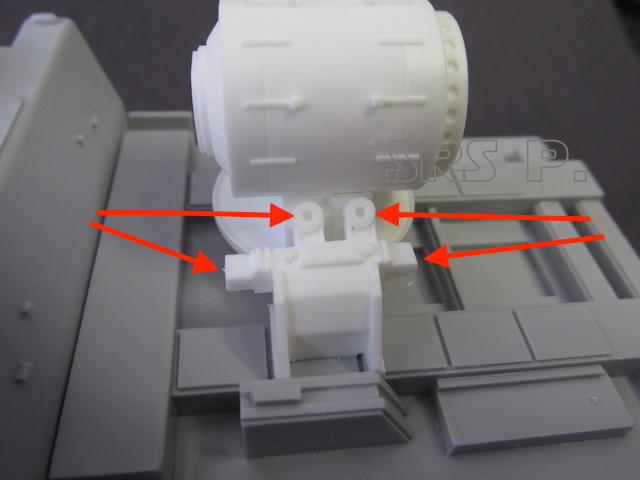
All three remaining part should be installed at the same time. This will ensure proper alignment, and that the parts are in line with the large cylinder and square with the base. This will take some positioning to get them in the right alignment.
Lunar truck generator
Lunar truck generator
Note that the side boxes are shown in position.
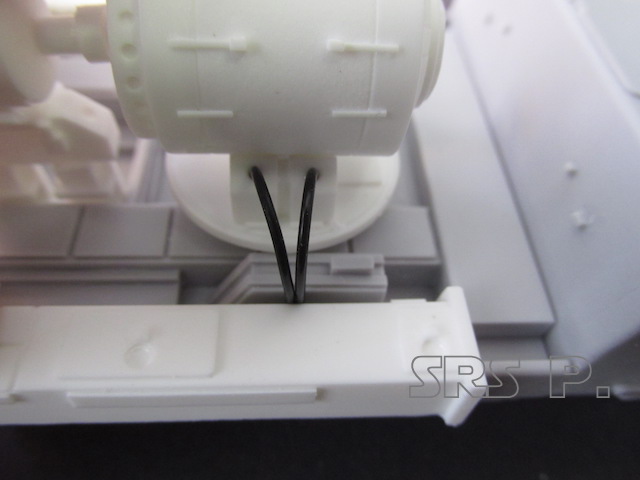
You can drill the holes on the right side of the base for the remaining hoses.
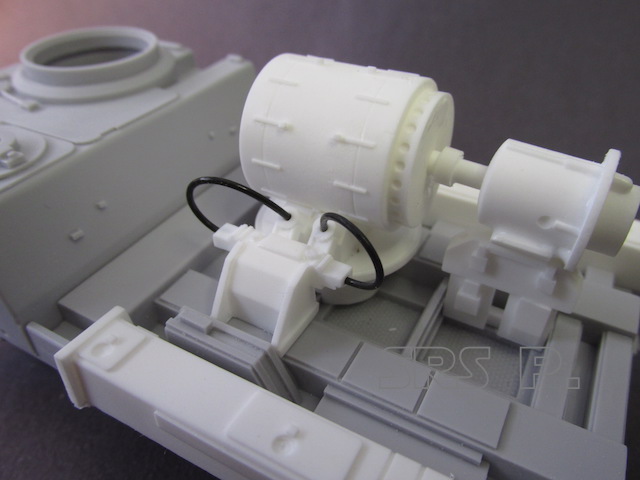
**The flexible hose supplied is 1mm. or. O3937” in diameter. Start with a 1mm or equivalent size drill and go up in size slowly if the hose does not fit into the 1mm holes drilled. Drill one hole first to test fit the hose. Red arrows, indicate where they are located, there is a starter point for your drill. You are supplied with 4.5” of hose. Be careful when cutting because you will need all of it. Each hose on this payload is the same length, 1.125” long.
Lunar truck generator
Lunar truck generator
For the location of the ends of these hoses, you can drill two holes side by side in the truck bed, or glue them to the side of one of the boxes. As long as the ends terminate onto the bed.
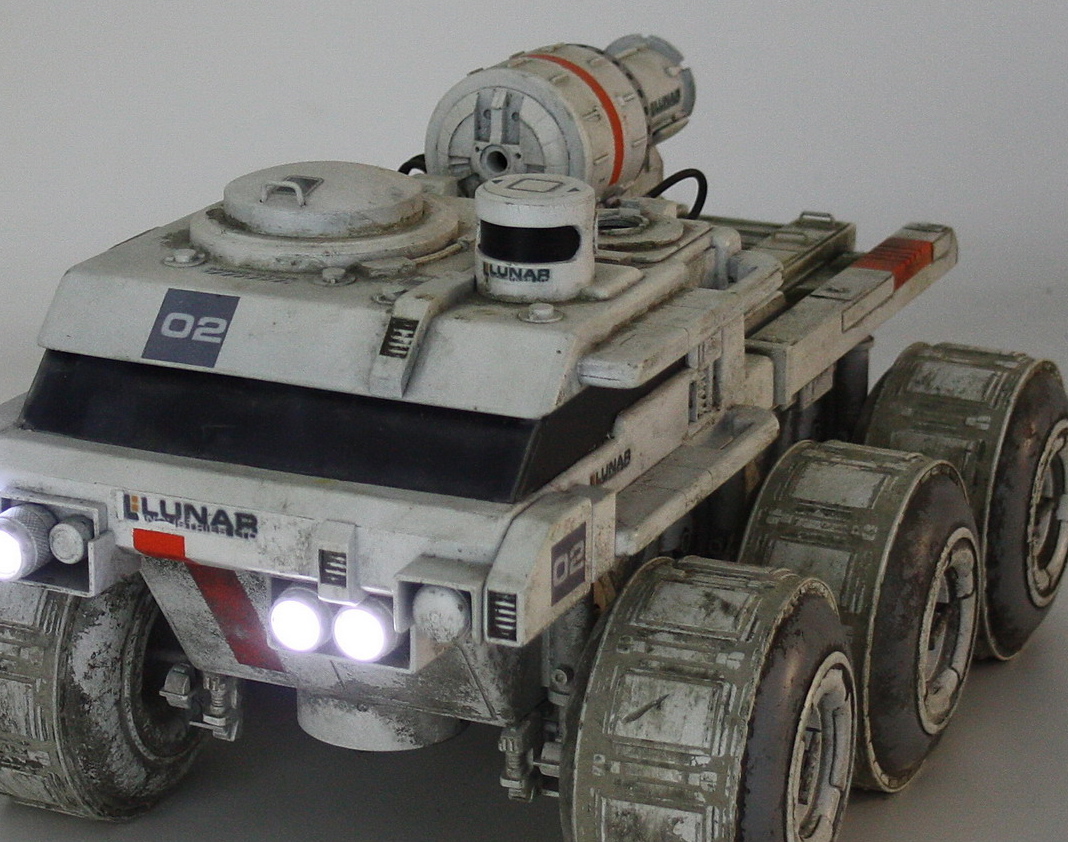
Decal Placement
Please note that this version gets the number 2, NOT the number 1. Notice the red stripe that goes around the large cylinder. Also note the extra red section that will need to be painted on the side boxes.
Lunar truck generator
Remember to send me images of your completed kit to be posted on this web site!
Thank you for your purchase!