
This kit is available exclusively at Federation Models;
Before you begin;
– Check to make sure that there are no missing or broken parts.
-The model should be carefully cleaned with warm soapy water and a soft tooth brush.
– Part seams or mold lines should be sanded and filled as necessary.
-All parts should be test fitted before gluing.
– A Cyanoacrylate glue ( super glue) should be used in attaching parts.
– Remove primer and paint to expose raw plastic to allow proper adhesion of glued parts.
– Read through all the instructions before beginning assembly
Over all parts:
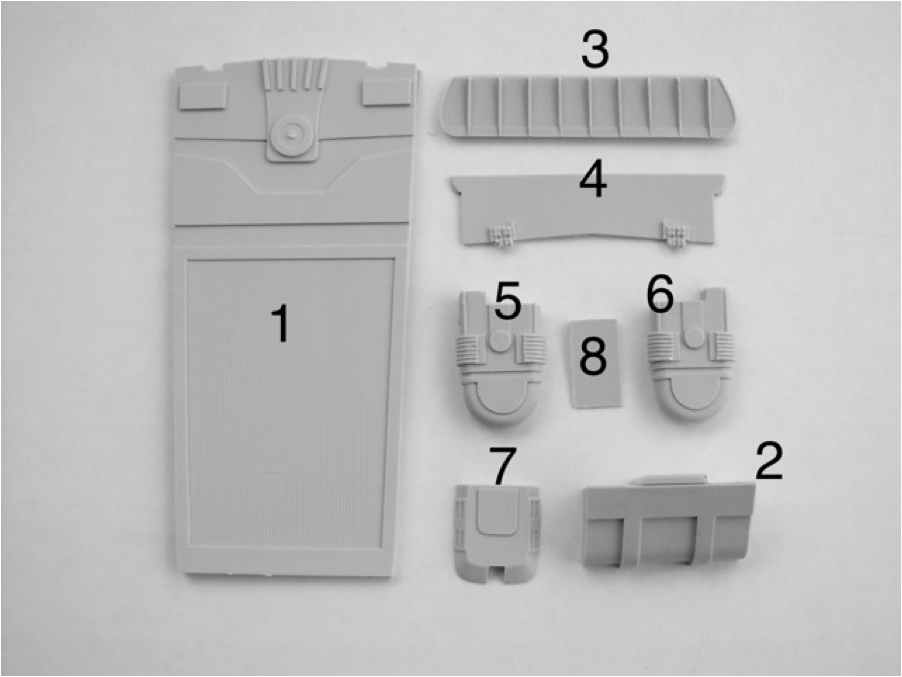
There should be 9 urethane parts and a decal sheet. (the main hull is not shown)
Exec. Shuttle kit
Top plate and bow windows
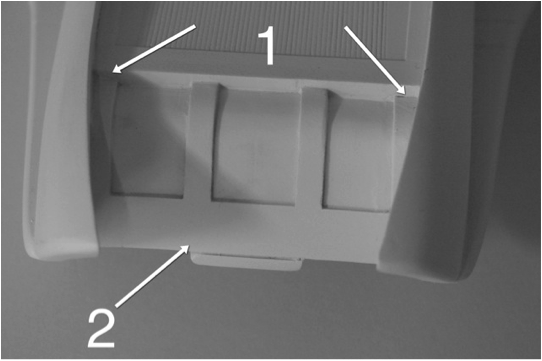
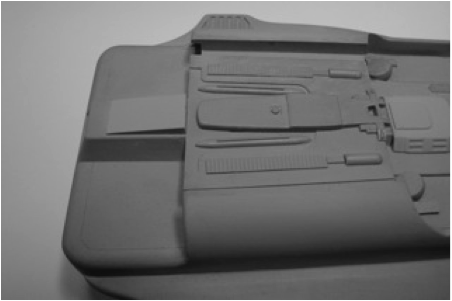
Start by test fitting the top plate (1) by sliding the top plate forward, starting from the stern of the hull. The plate should contact the front ribs on the hull. (It may be necessary to sand the sides and flat sand the bottom of the top plate to achieve the proper fit. Use caution and go slowly when doing this.)
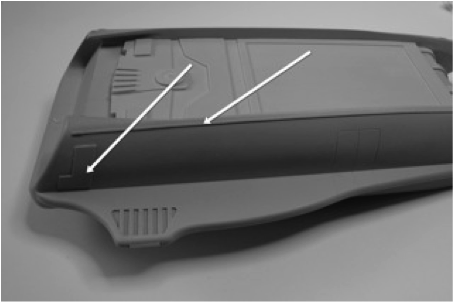
Arrows indicate the proper alignment of the top plate. Part (2) is shown already in place.
Exec. Shuttle kit
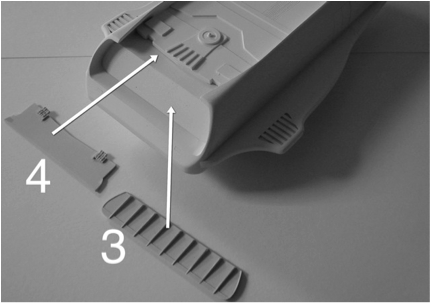
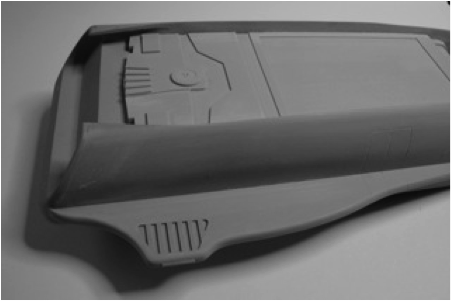
Once parts 1&2 are glued in place, parts 3&4 can be fit, but do not glue them.
(more on that later)
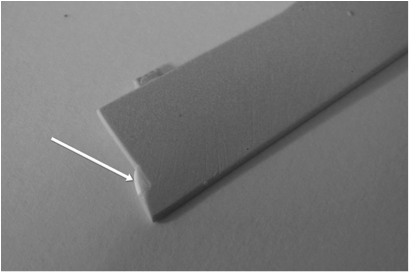
It may be necessary to flat sand part 3 for proper fit. Use caution when doing this so as not to damage the fine edging detail.
Exec. Shuttle kit
Exec. Shuttle kit
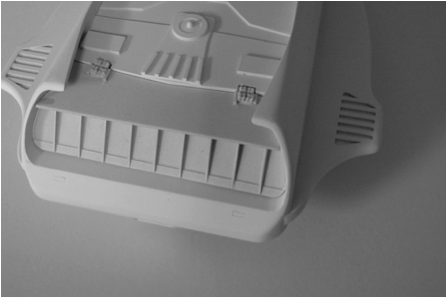
Due to shrinkage of the main hull, it may be necessary to add a small filler piece to part 4 to better fit the hull, as shown below.
Exec. Shuttle kit
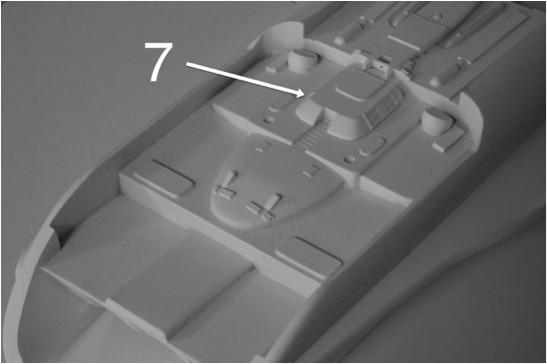
You can now turn the model over at this point to assemble the parts that are located on the bottom of the hull. Position and glue part 7 as shown below.
Exec. Shuttle kit
Parts 5,6,and 8 are positioned as pictured, but only glue part 8 in position. It will be easier to paint parts 5 and 6 separately.

Exec. Shuttle kit
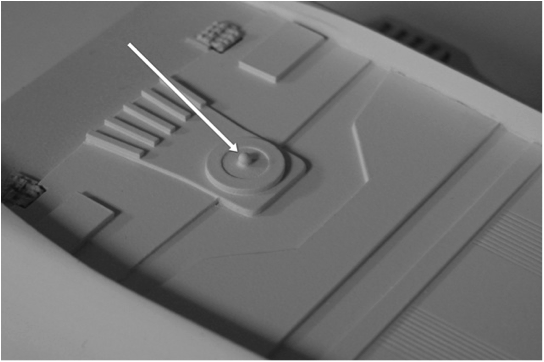
The final part to glue in its place is the small ball that is located on the top plate (1).
Exec. Shuttle kit
Please take note of the following:
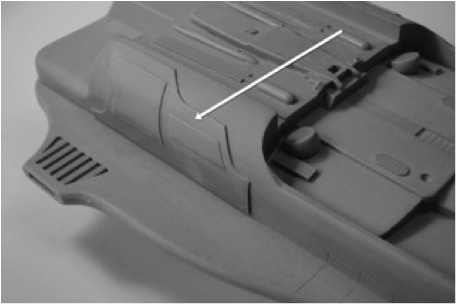
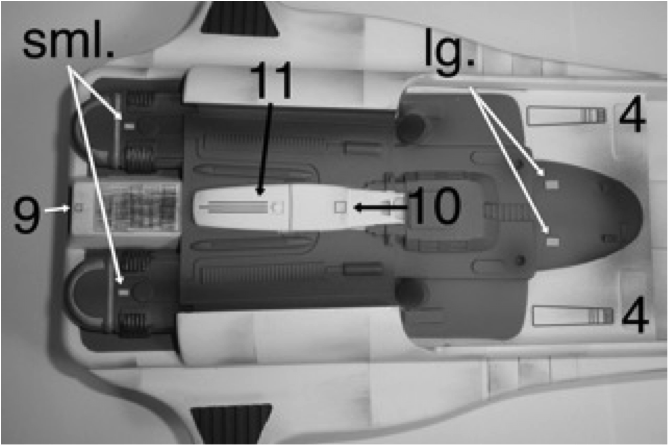
There are details that need to be removed from your hull casting to make the shuttle version. The images below indicate what and where to remove.
Exec. Shuttle kit
Exec. Shuttle kit
Exec. Shuttle kit
Exec. Shuttle kit
Painting & decals
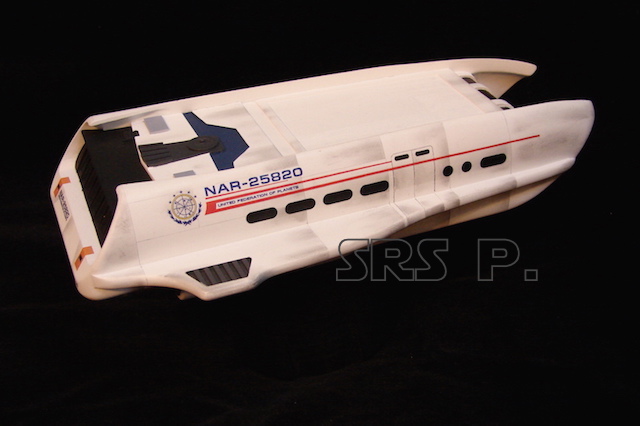
The basic color scheme of the Executive shuttle is an over-all hull color of white. You can add panel lines and variations of white and off-white to indicate panels and weathering, to your taste.
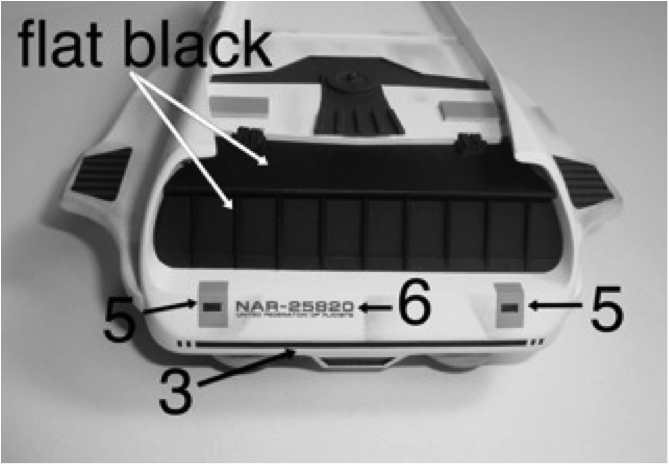
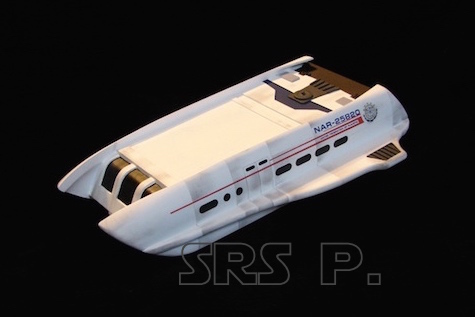
Parts 3 & 4 are flat black or a dark charcoal in color. This is why they were not glued into place after fitting them. The images below show parts 3&4 painted and in place, as well as the locations of the stern and ventral decals.
Exec. Shuttle kit
Exec. Shuttle kit
These are some images of how I painted the kit. A bit of weathering and panels. nothing fancy.
Exec. Shuttle kit
Exec. Shuttle kit

Exec. Shuttle kit

Exec. Shuttle kit