
Cab interior kit
Before you begin:
– Check to make sure that there are no missing or broken parts.
-The model should be carefully cleaned with warm soapy water and a soft toothbrush.
– Part seams or mold lines should be sanded and filled as necessary.
– All parts should be test fitted before gluing.
– A Cyanoacrylate glue, (super glue) should be used in attaching parts.
– Read through the instructions completely before gluing or painting.
– Remove primer and paint to expose raw plastic to allow proper adhesion of glued parts.
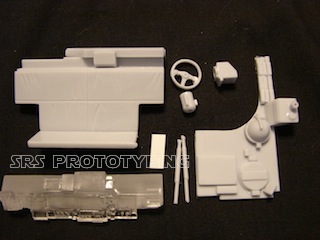
An Over view of the kit parts, including one styrene piece.
Test fit the parts before painting & gluing.
Truck interior kit
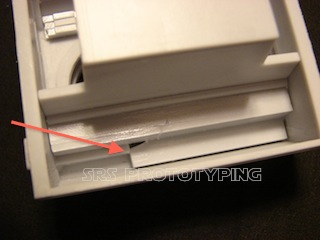
The ceiling detail plate should drop into position as shown below with out difficulty.

truck interior kit
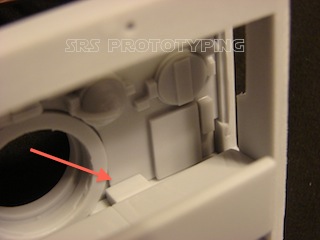
The top of the bench seat should also sit up against the ceiling. You may have to remove some material where the seat touches the ceiling details for proper fit. (arrow)
truck interior kit
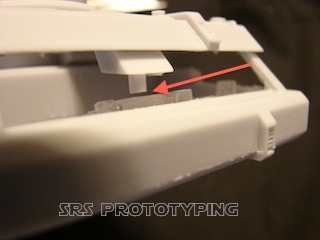
The arrow in the image below shows where the seat back overlaps the ceiling detail plate.
truck interior kit
truck interior kit
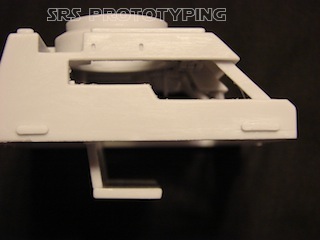
A view showing the seat in position and level with the cab floor.
Truck interior kit
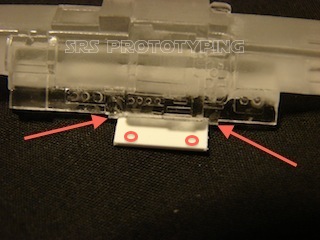
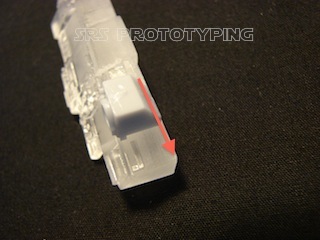
Trim the styrene piece to fit in between the two guides and glue it so it is level with the cab floor. (The two circle show where the joy- sticks are positioned.)
Each joystick has an engraved line that indicates where to cut it for its correct length.
Truck interior kit
The next image shows the dashboard in place, from the underside up against the front of the chassis plate.
truck interior kit
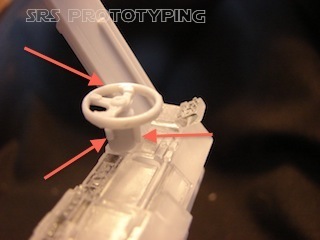
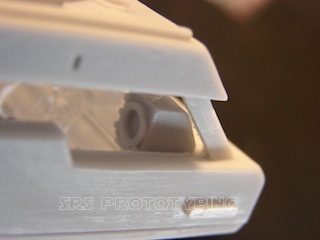
When fitting the steering wheel into place there are a couple of things to look for, the orientation of the steering wheel base, the placement on the dashboard and position left & right. The arrows indicate the details on the steering wheel base and how the wheel touches the chassis plate.
Truck interior kit
Be careful not to notch the chassis plate to allow more room for the wheel as that may open a hole visible from the outside.
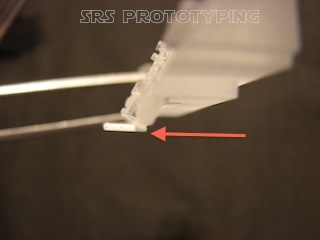
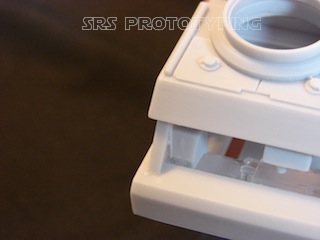
The next part to fit is the small box that sits on the passenger side of the dashboard.
Truck interior kit
It is recommended that this part be glued in place after test fitting that it clears the cab interior wall as shown below.
Truck interior kit
Truck interior kit
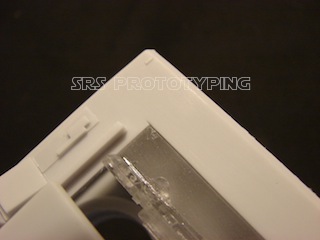
Be sure to fill any gap between the dashboard and the ceiling plate pipe.
truck interior kit
Thank you for your purchase!