
Before you begin:
– Check to make sure that there are no missing or broken parts.
-The model should be carefully cleaned with warm soapy water and a soft toothbrush.
– Part seams or mold lines should be sanded and filled as necessary.
– All parts should be test fitted before gluing.
– A Cyanoacrylate glue, (super glue) should be used in attaching parts.
– Read through the instructions completely before gluing or painting.
– Remove primer and paint to expose raw plastic to allow proper adhesion of glued parts.
Over all parts:
There should be 17 parts in total, including the main body.
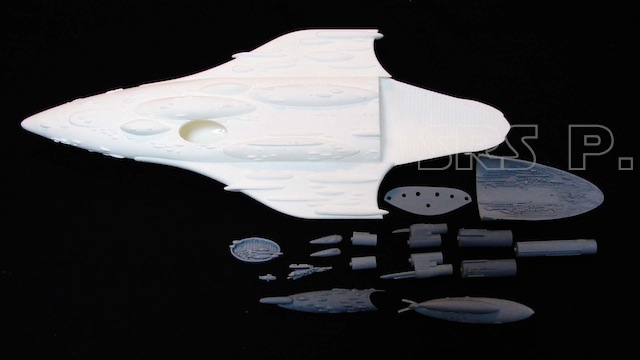
Liberty Cruiser complete kit
Engine area assembly
Step 1) After checking for proper fit in the body, position the engine plate so the small block, pictured below, faces towards the front of the ship.

Liberty Cruiser kit
Step 2) Position the plate as shown.

Liberty Cruiser kit
*A suggestion for those who wish to light this model. The engine plate fits tight enough that you can assemble the engines to the plate without gluing it plate in place. After each engine is glued in position, holes can then be drilled from the back side of the plate for LED’s. Open the back of the ship behind the plate to access the interior.
Use the images below for proper layout of the engine area.
*Remember to test fit before gluing*

Liberty Cruiser kit

Liberty Cruiser kit
Step1

Liberty Cruiser kit
Step 2

Liberty Cruiser kit
Step 3

Liberty Cruiser kit
Step 4

Liberty Cruiser kit
Step 5

Liberty Cruiser kit
Recessed bay

Liberty Cruiser kit
Carefully follow the scribe line provided in the hull to cut the opening for the drop in oval part.

Liberty Cruiser kit

Liberty Cruiser kit

Liberty Cruiser kit
Bridge and top detail

Liberty Cruiser kit

Liberty Cruiser kit

Liberty Cruiser kit
Thank you for your purchase!