
SRS Prototyping Moon Truck Kit Instructions
Before you begin
– Check to make sure that there are no missing or broken parts.
-The model should be carefully cleaned with warm soapy water and a soft toothbrush.
– Part seams or mold lines should be sanded and filled as necessary.
– All parts should be test fitted before gluing.
– A Cyanoacrylate glue, (super glue) should be used in attaching parts.
– Read through the instructions completely before gluing or painting.
– Remove primer and paint to expose raw plastic to allow proper adhesion of glued parts.
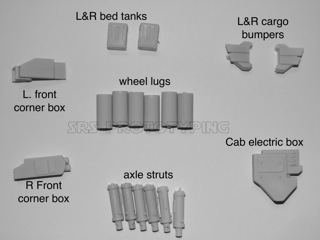
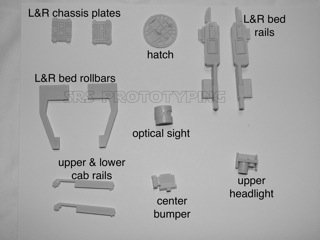
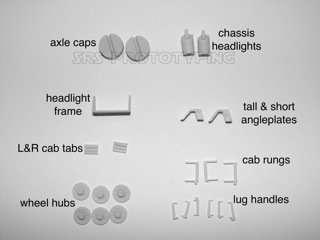
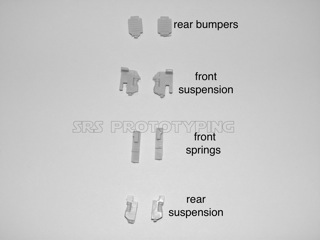
The following parts lists should be your guide throughout the assembly process.

Moon truck kit
Moon truck kit
Moon truck kit
Moon truck kit
Moon truck kit
Moon truck kit
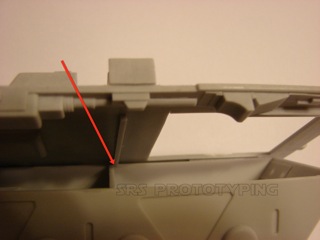
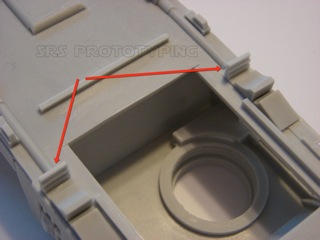
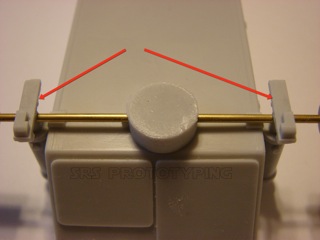
You should first start off by test fitting the chassis plate to the chassis box and then test fit the cab to the chassis plate. The arrow indicates that the plate rib is in front of the box rib.
Moon Truck kit
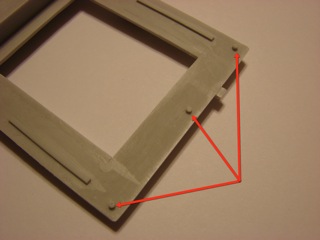
Three small posts align the cab to the plate, do not glue any parts together at this point.
Moon Truck kit
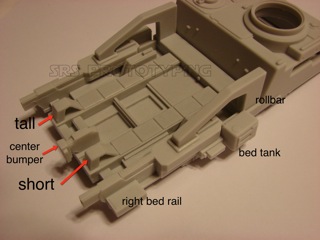
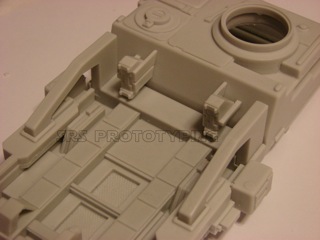
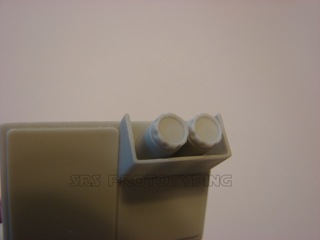
If you have purchased the cockpit interior kit, you should follow those instructions now. Some of the bed components are shown in position below.
Moon Truck kit
Arrows indicate the tall & short angle plates as well as the center bumper. These parts can be glued in position at this time. * Give some thought to priming & painting the components before gluing themn in place.*
Below shows the cargo bumpers in their proper position. The small alignment tabs can be removed after gluing.
Moon Truck kit
Moon Truck kit
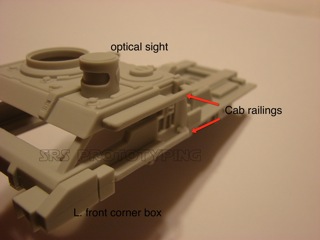
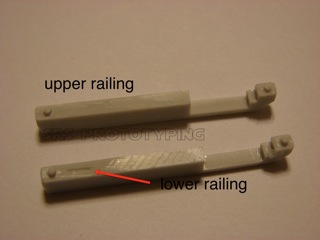
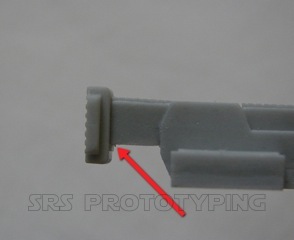
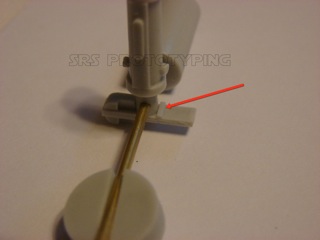
The L. front corner box should not be glued in place until you are ready to glue the chassis plate to the cab. Note there is an upper and lower railing. The image below shows the slot in the bottom railing.
Moon Truck kit

Moon Truck kit
For placement of the styrene strip (above), fit the two boxes first, making sure they are square and level to the cab. Then test fit the strip, making sure it is level. This strip also needs to have a rounded edge put on it.
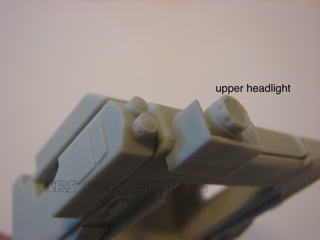
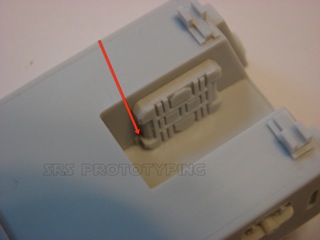
The upper headlight should not be glued in place until you are ready to glue the cab to the chassis plate.
Moon Truck kit
Moon Truck kit
The chassis headlights and frame in position:
Moon Truck kit
The rear bumpers are positioned as show below.
Moon Truck kit
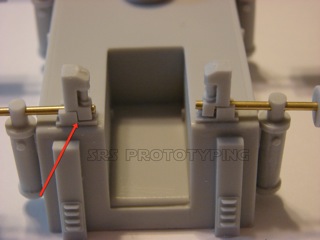
The L&R chassis plates are positioned as show on both sides.
Moon Truck kit
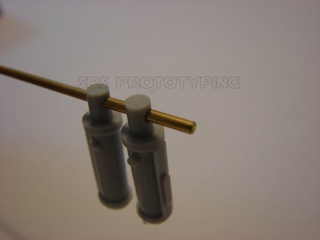
The most important part of the kit is the placement of the axle struts. Theses parts are the most fragile and need to be handled with care while fitting.
Cut the two long brass axles down to be “3.080 in length. The short Brass rod should be cut in half and the two pieces cut down to be “1.180 in length. Square off and slightly bevel each end of the axles. Test fit each strut onto an axle to be sure the axle passes through fairly easily.
Moon Truck kit
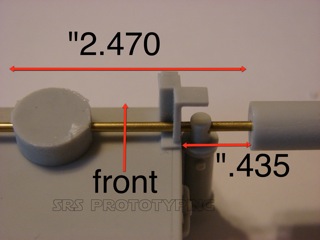
The distance between the chassis box and the axle lugs should be approx. “.435 . The overall distance between wheel lugs on the axle should be approx. “2.470.
Moon Truck kit
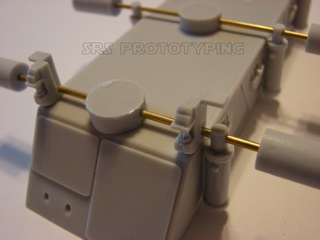
Note the position of the front suspension parts.
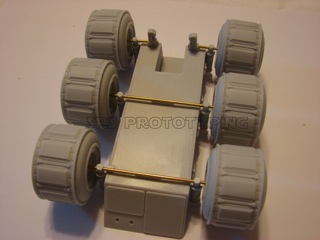
All axles, struts and tires in place.
Moon Truck kit
This image shows the front suspension parts in position. These should be added after the axle caps are secured in place.
Moon Truck kit
Note the proper position of the front springs.
Moon Truck kit
This is how to position them for gluing.
Moon Truck kit
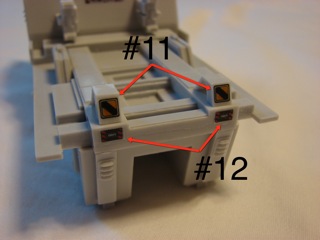
Rear suspension parts in location. Nice and tight against the supports. (arrow)
Moon Truck kit
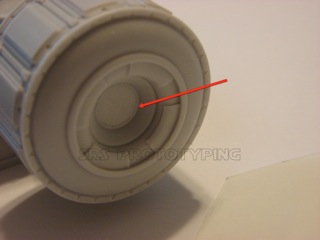
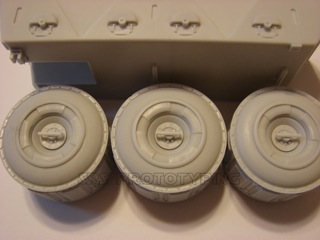
Wheel lugs and the tires’ flat surface should be flush. There is a thin flat edge that the hubs will sit on. This small flat is not present on the back or inside, so it is important to have the proper side of the tire face out. The casting gates that are on your raw castings are considered the back or inside of the tire. (facing the chassis box)
Moon Truck kit
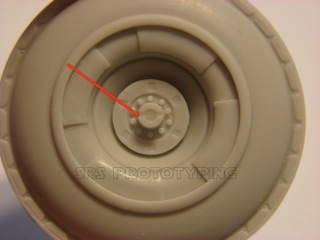
The wheel hubs sit on the flat surface (arrow) inside the tire. The arrow indicates the small half-round on the hub, to receive the rung.
Moon Truck kit
No matter how you position or display your Lunar Truck, the lug handles should always be parallel the bottom of the chassis box as shown below.
Moon Truck kit
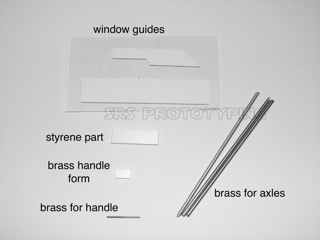
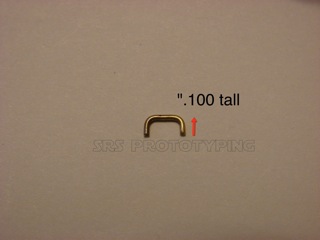
The hatch handle is formed using the small styrene piece as a guide to bend the .028 brass rod around. This will ensure the rod will be the proper width.

Moon Truck kit
Moon Truck kit
Leave extra length beyond “.100 to glue into the holes drilled into the hatch. There are two dimples on the hatch to use as a guide.
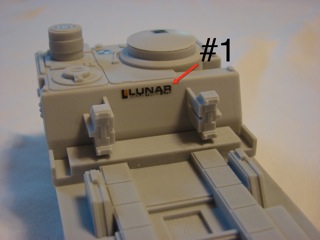
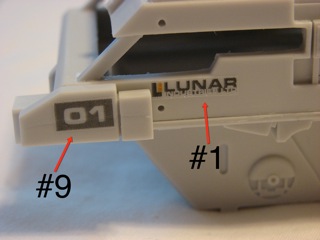
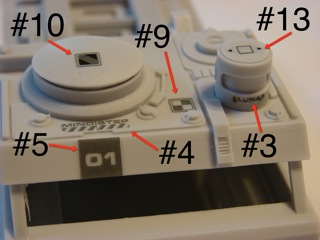
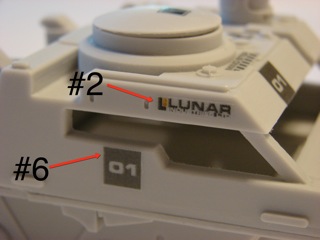
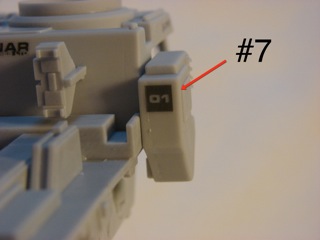
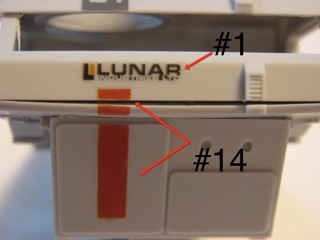
Decal Placement
Moon Truck kit
Moon Truck kit
Moon Truck kit
Moon Truck kit
Moon Truck kit
Moon Truck kit
The red stripe, #14, will need to be cut into three pieces.
Moon Truck kit
Thank you for your purchase!