This master pattern is a prime example of how I create a complex-contoured shape. Utilizing my digital readout on the mill, I can insure a true & square starting block and a left to right symmetry. These first step are shown below…

Contour outlined w/center holes.
The two center holes allow for mounting on a block that is captured in the vise on the mill.
You can see below the point by point contour milling I did to create the complex shape for the hull. Very time consuming and tedious, but perfectly symmetrical.

Point by point contour.
The sanded & blended finished upper hull surface.

Smoothed hull shape.
Before I move onto the bottom of the hull, I do all of the milling and shaping and detailing needed while I have a good firm grip on the pattern via the milling block underneath.

Upper hull shaping
Notice in the image below how thick the the block is to allow for the curve and ‘droop’ of the wings, a full two inches!

Upper hull shaping
The filming model has a series of scales that need to be scribed into the hull. In order to get these at the proper angle and to keep them evenly spaced, I held the milling block in the jaws of my lathe. I set the block at the proper angle for each direction and used the lathe saddle as a surface for my height gauge to do the scribing.

Upper hull scribing
Now on to the bottom of the hull.
I used the milling block as before to establish the various contours. Final shaping was done with the use of wall thickness gauges attached to my calipers. The gauges allowed for the same level of symmetry as on the top of the hull. More hand worked involved on the bottom hull, but well worth it!
I drew grid lines to ensure symmetry as I hand carved and sanded the bottom.

Bottom hull shaping.
Once all of the shaping was complete, I could move onto the scribing details. The next images show all of the scribing that was done and the tail fins in place. The master was primed after all of the work was done to allow for a smooth surface for molding.

Bottom scribing

Bottom scribing

Bottom scribing
Note on the images below the detailed ‘scales’ scribing. I created a pattern guide for the wavy lines, which were all scribed by hand. ( whew! )

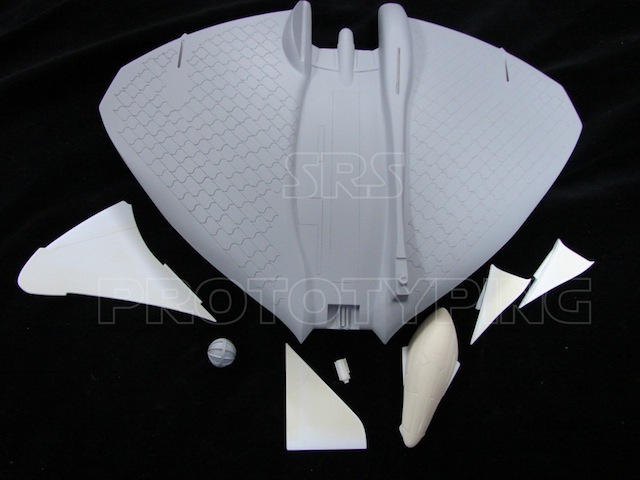
Final pattern assembled.

Final pattern assembled.
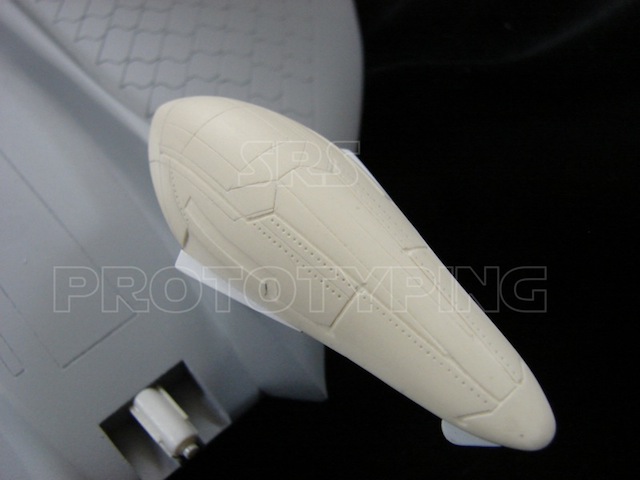
Pictured below is a nice close up of the cockpit. Another complex shape with scribing and rivet detailing!
Eight parts make up the completed kit pattern.